Sharing Notes
Share your notes with one person or everyone in your organization.
Want a central company notes? We recommend creating a dedicated email address (for example share@yourdomain.com) and sharing its notes.
Step 1: Choose Share Folder
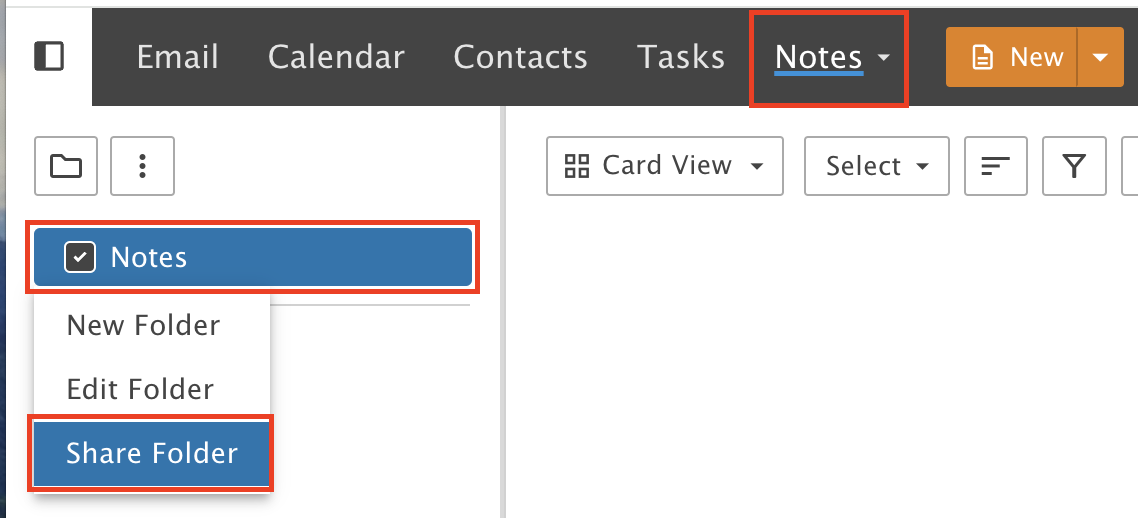
In the Notes section, right-click Notes in the left menu and select Share Folder.
Step 2: Pick who and how much access
You can share this folder with one user, several users or all users.
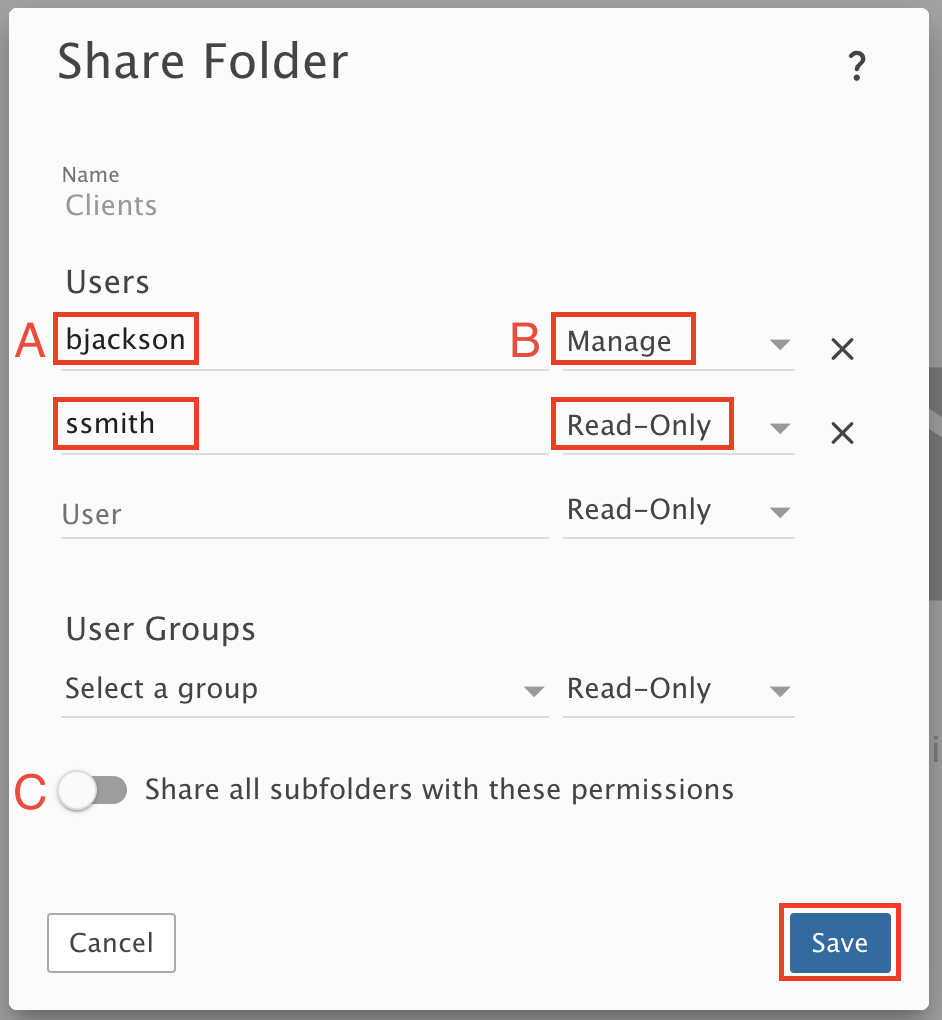
A) Start typing the user's name. A pop-up lists matching names. Select the user. (To share with all users, see Step 3.)
B) Set the Access permission (see the list below).
C) You can also choose to share all the subfolders in this folder.
Click Save.
What each access level means
- None: This acts as a "negater". For example, use it when you want to give everyone access except one specific user.
- Read-Only: The user can only view the items in the folder. They cannot edit, add and so on.
- Manage: The user can add, edit and delete any items in the folder, but not the folder itself.
- Owner: The user gets full control, including the ability to rename or delete the shared folder. They use it just as if it were their own.
Step 3: Or share with everyone
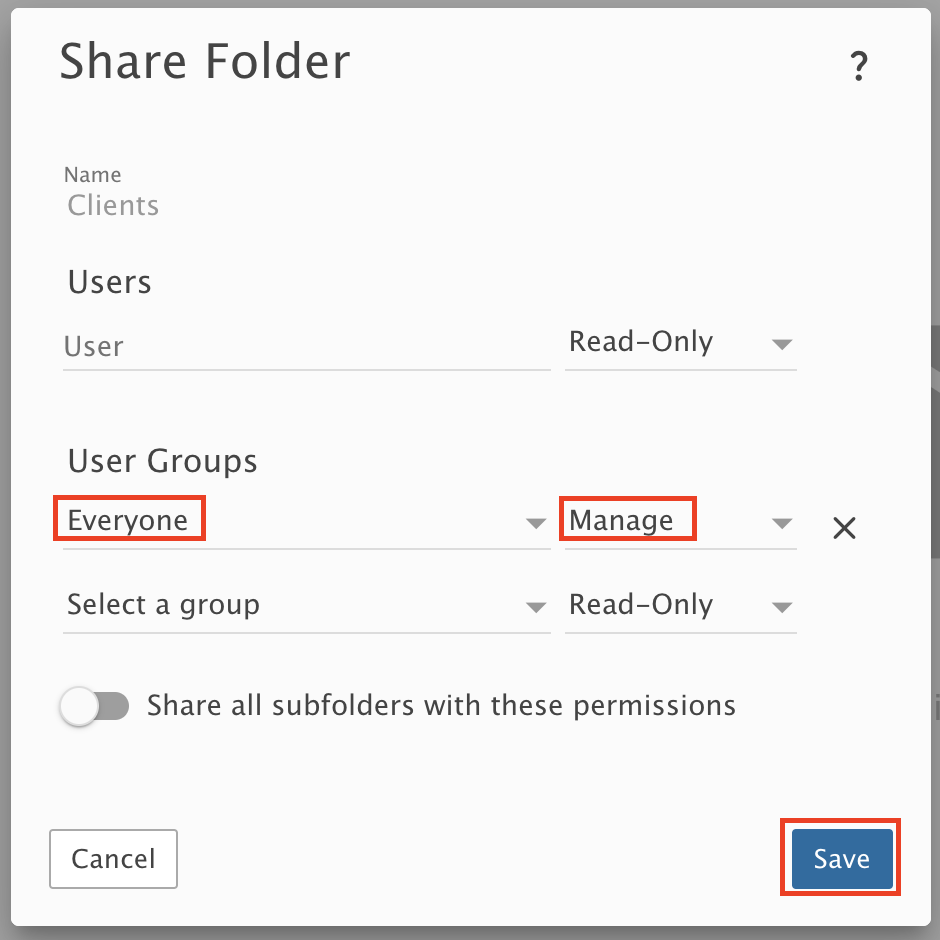
To share with all users in your organization, select Everyone under User Groups. Set the Access permission. You can also choose to share all the subfolders. Click Save.
Step 4: Check that it shows up
The Shared Notes now show up for the people you shared them with.
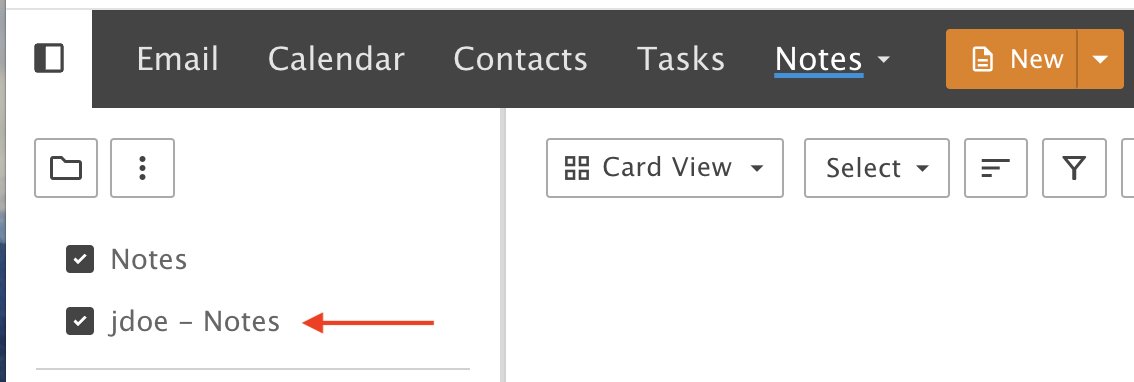
Step 5: Hide or show it
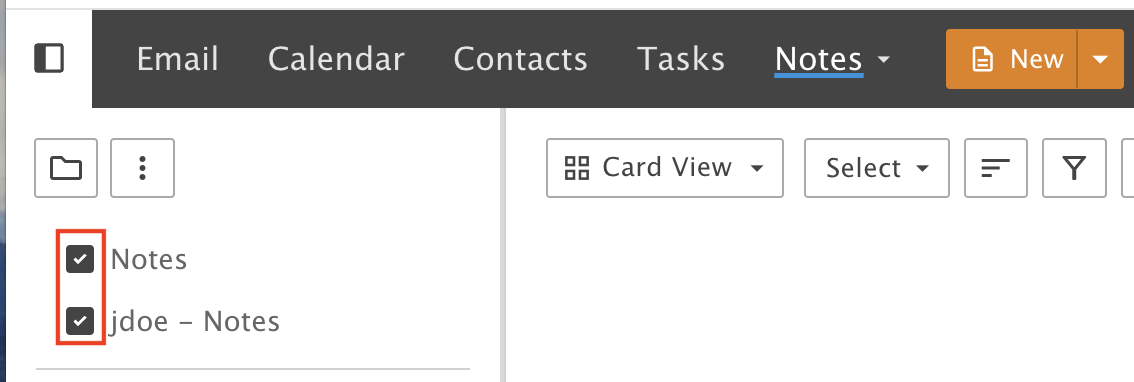
Users can hide or unhide any shared notes by putting a check in these boxes.