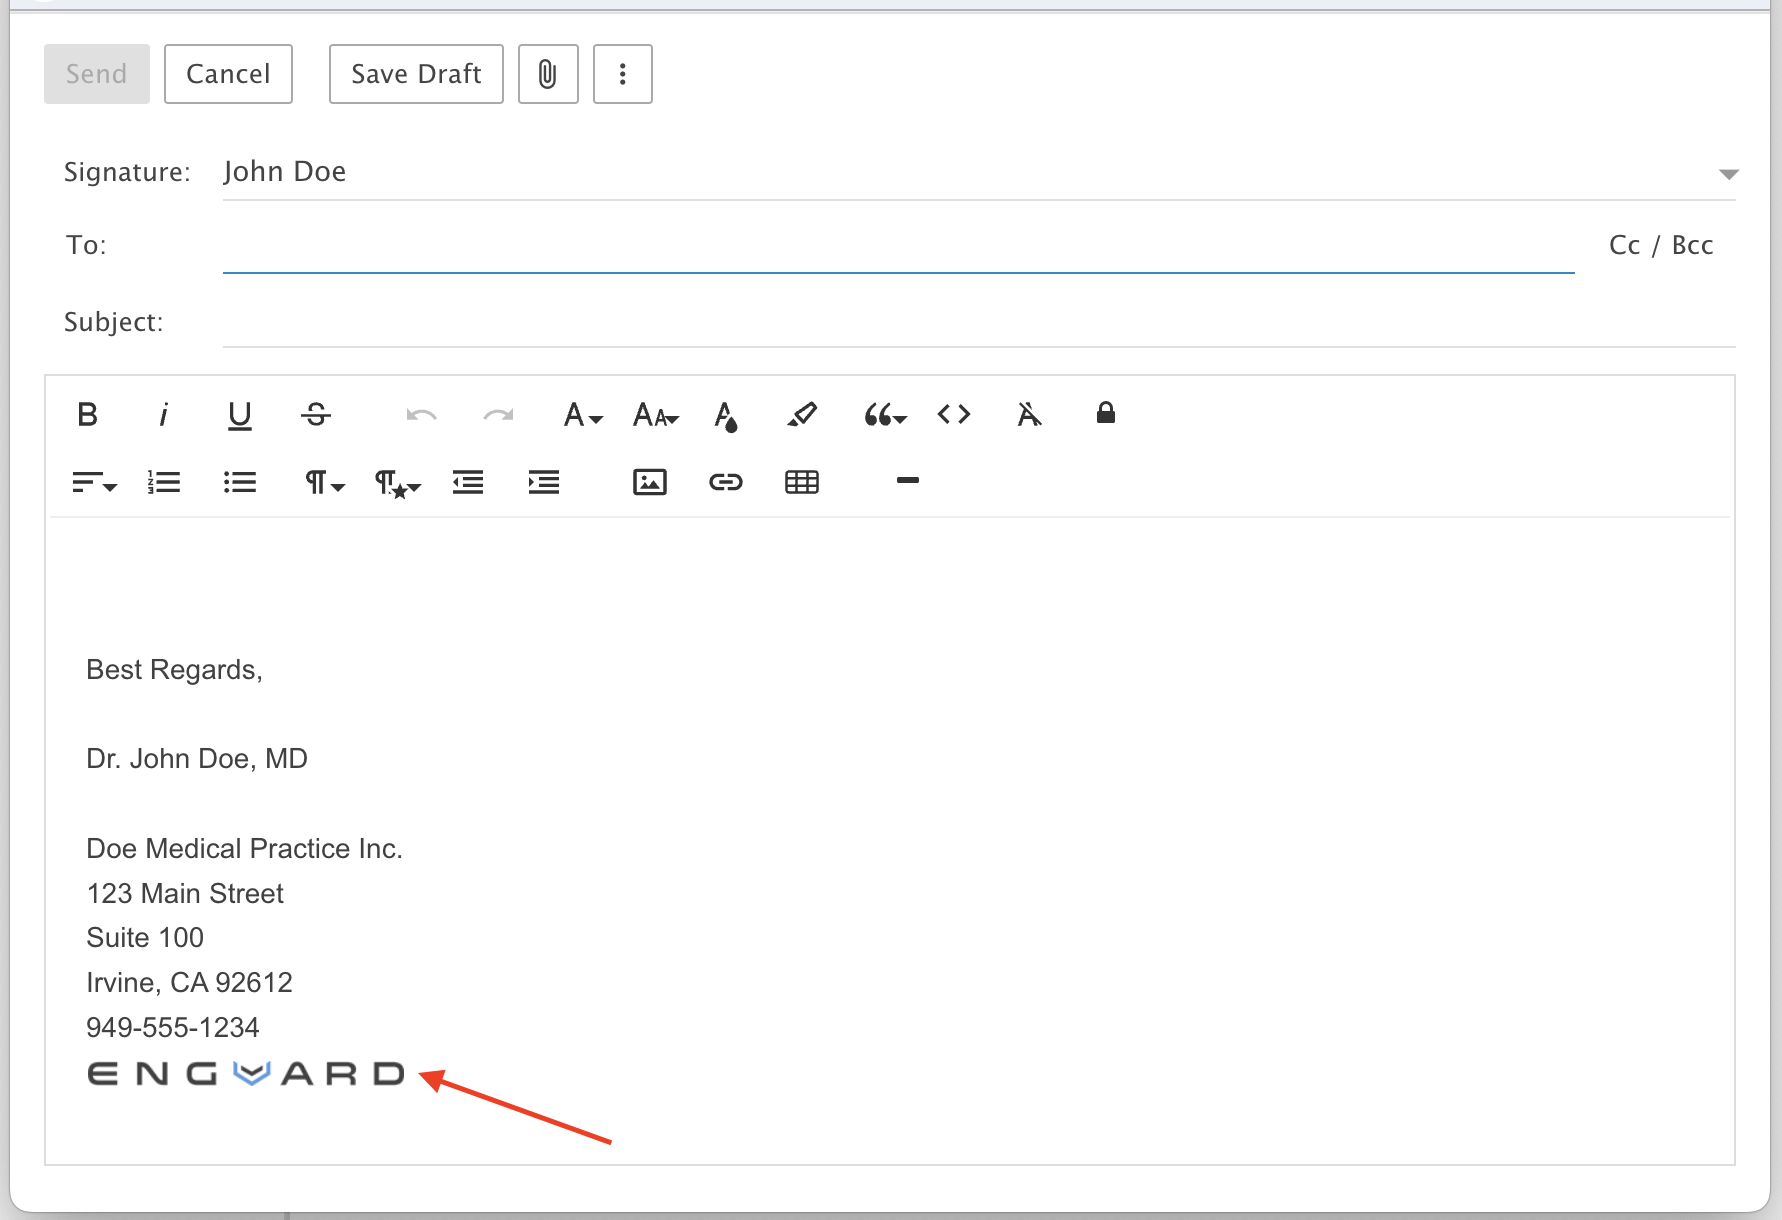
Adding a Logo to your Email Signature
Add your logo to your email signature in webmail.
Step 1: Open Settings
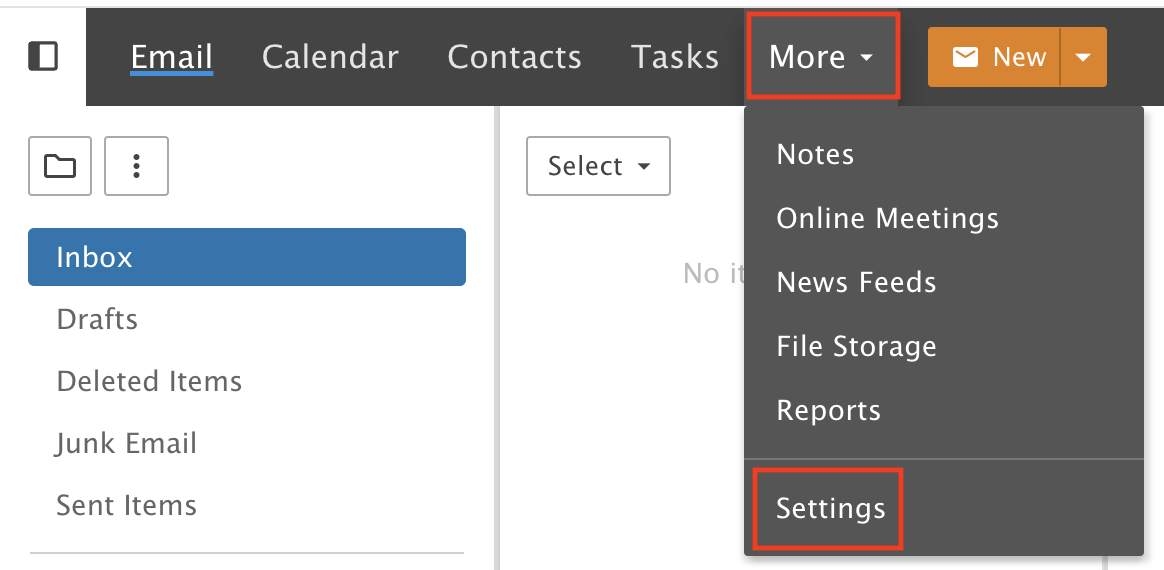
Click the More drop-down menu and choose Settings.
Step 2: Pick your signature
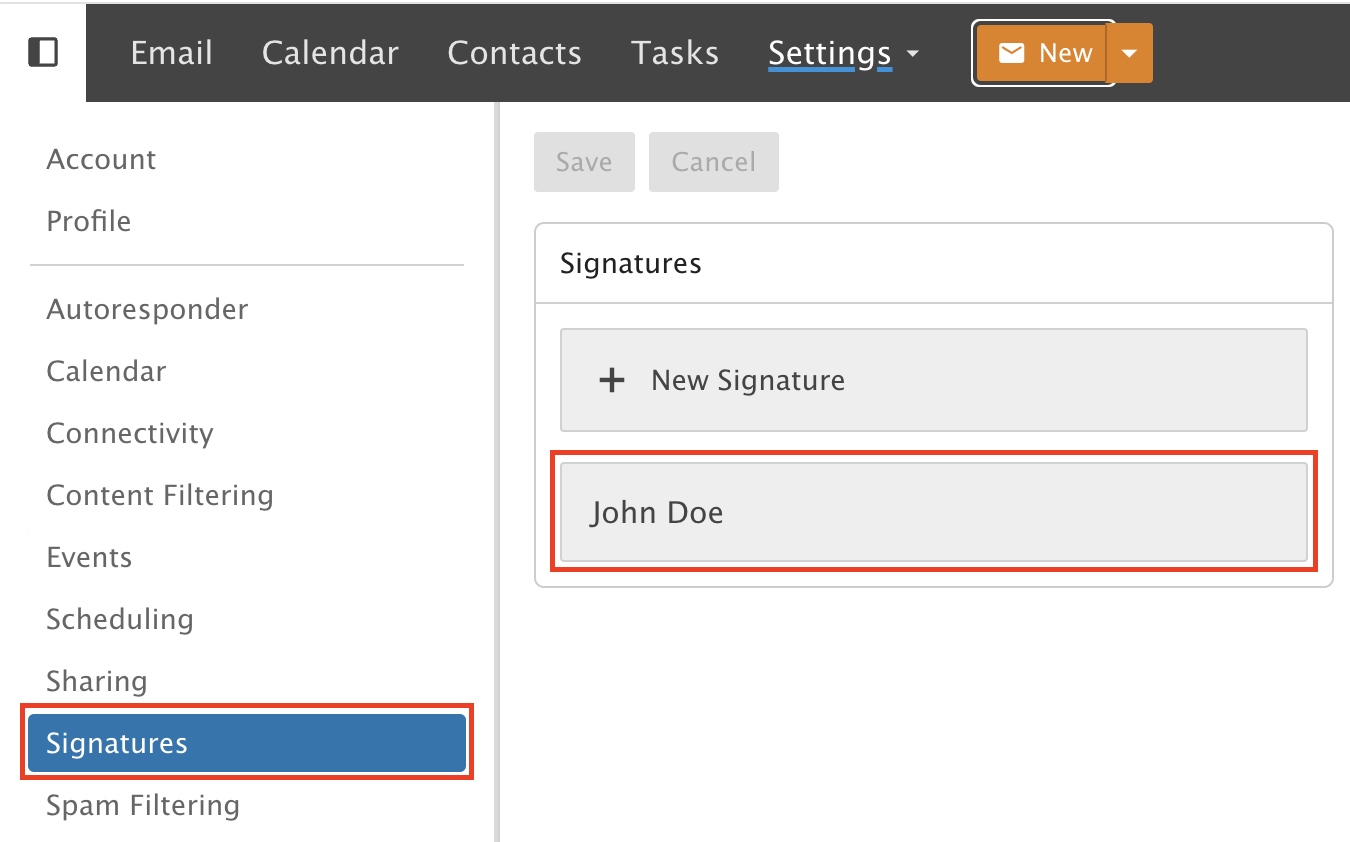
Click Signatures in the left menu. Then click the signature you want to add the logo to.
Step 3: Place your cursor
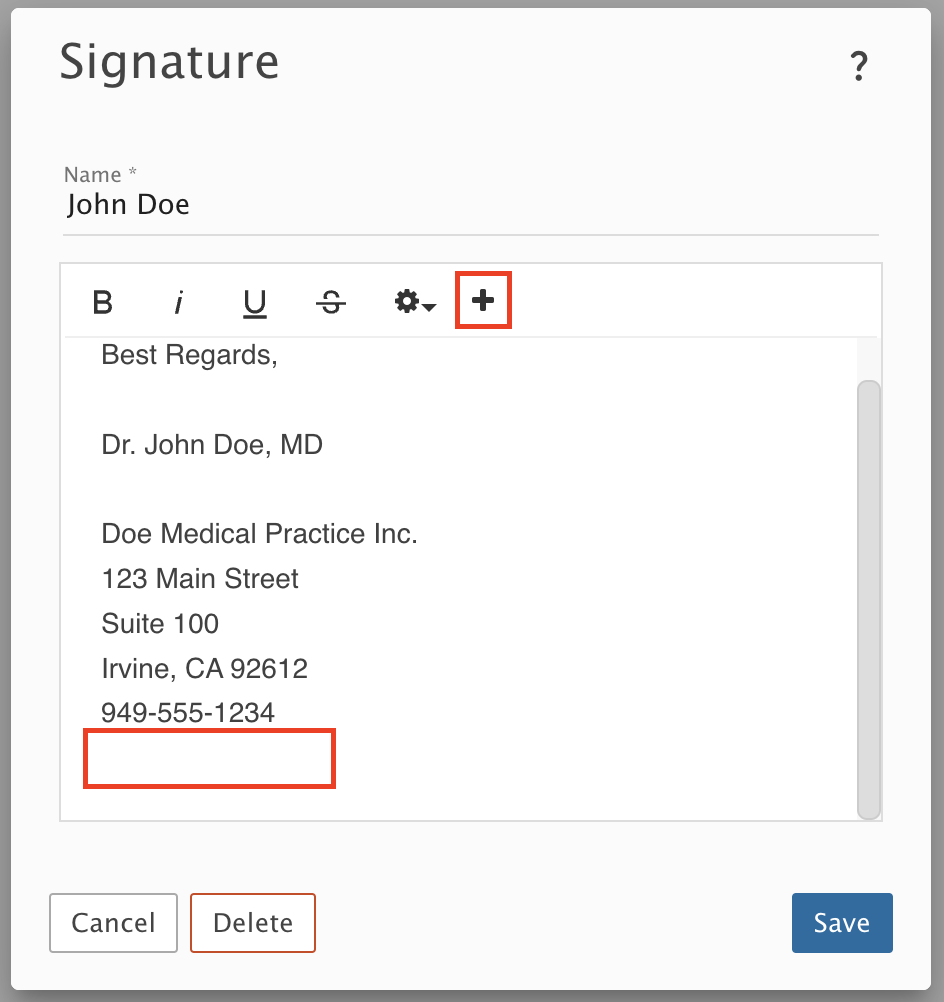
Put your cursor where you want the logo. Click the + icon to show formatting options.
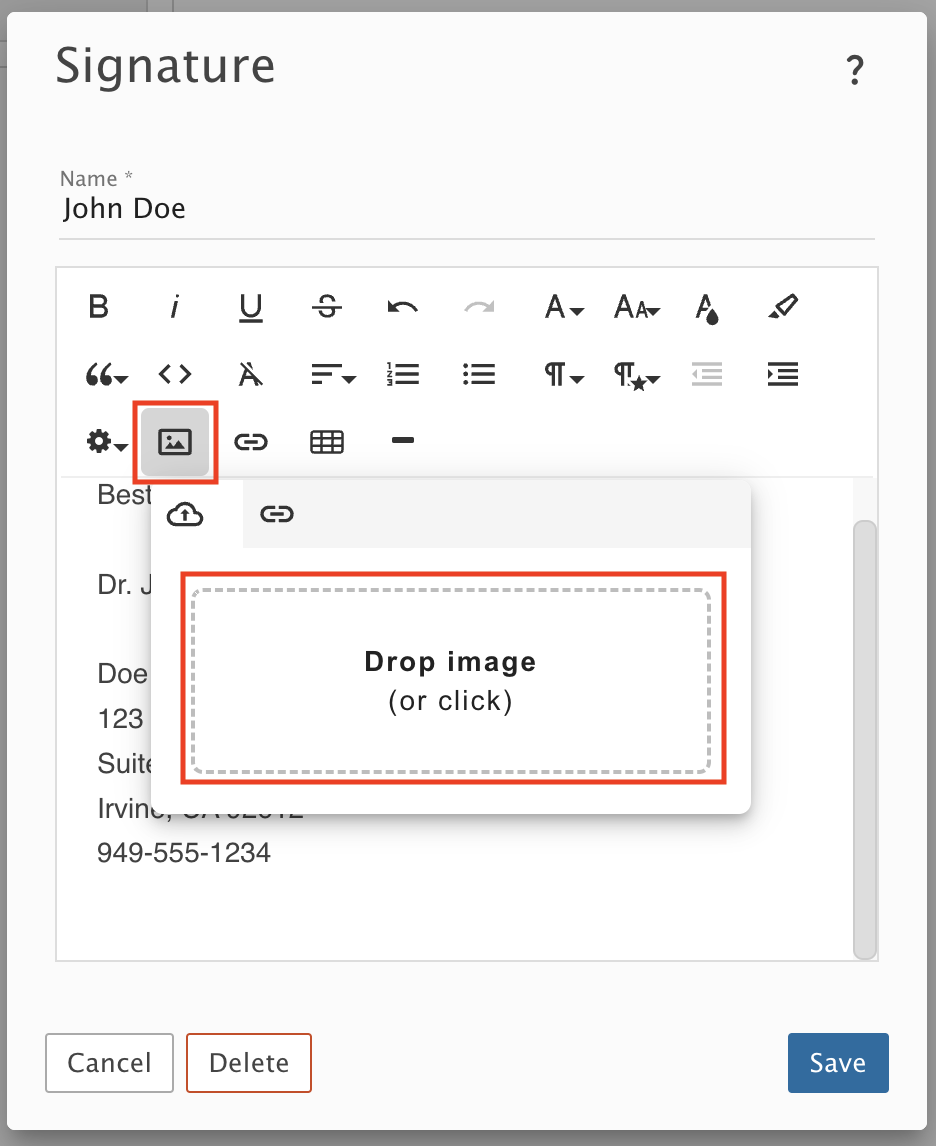
Step 4: Upload your logo
Click the Insert Image icon. Then drag and drop your logo into the box.
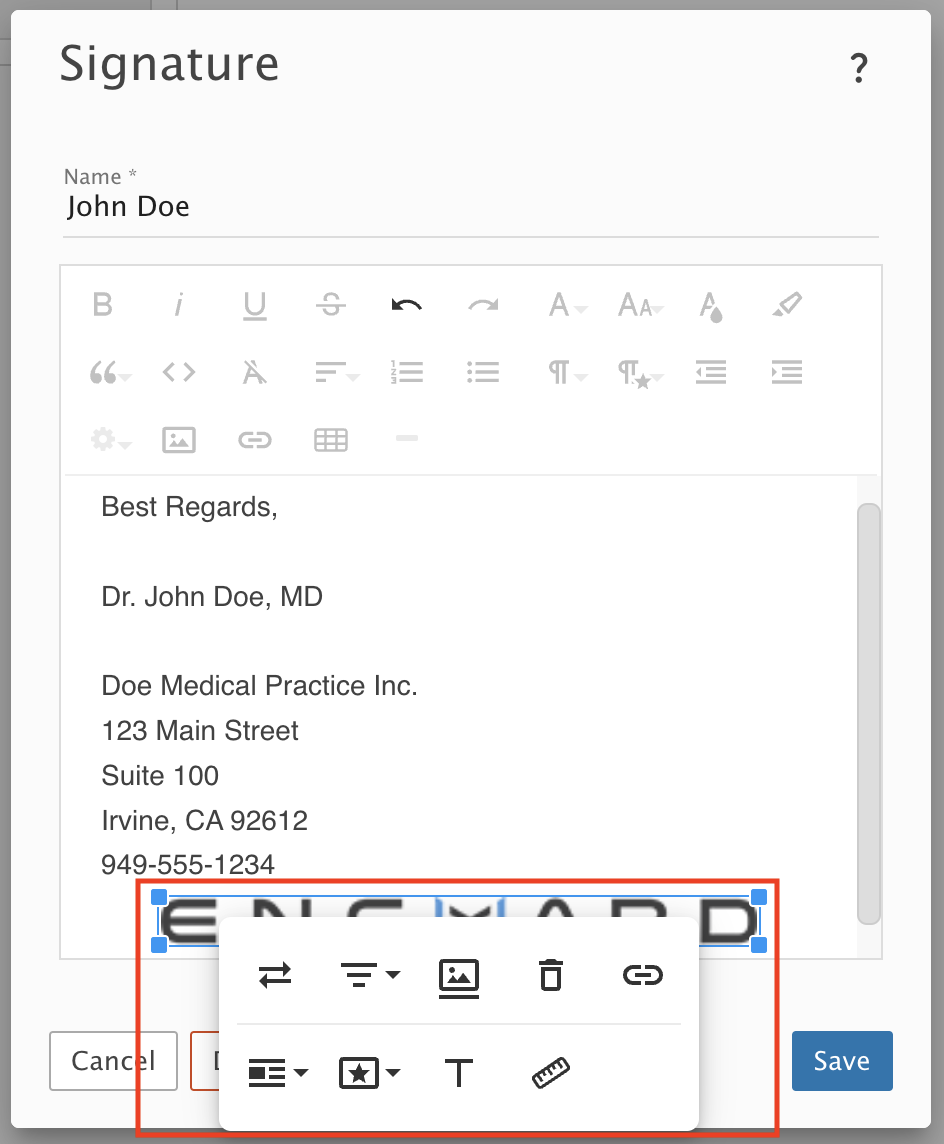
Step 5: Adjust your logo
Align it to the left, middle or right, add a link and so on. Drag the blue corners to resize the image.
Step 6: Save
Check that the logo looks right, then click Save.

Your logo now shows in every message you send.