Share a Calendar
Share a calendar with other people in your organization.
To set up a centralized company shared calendar, we recommend creating a dedicated email address (for example share@yourdomain.com) and sharing its calendar.
Shared calendars only show up on other users' phones if you give them Manage or Owner access in Step 2.
Step 1: Open the share window
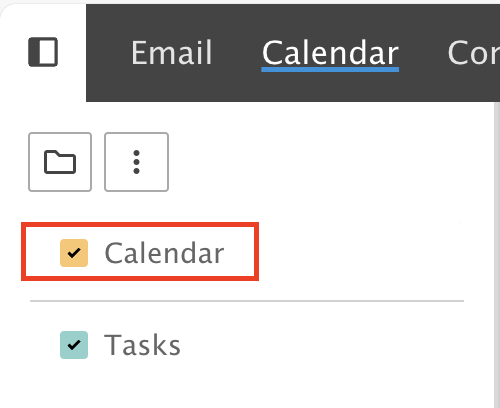
Right-click the Calendar you want to share, then click Share Folder.
Step 2: Share with one or more users
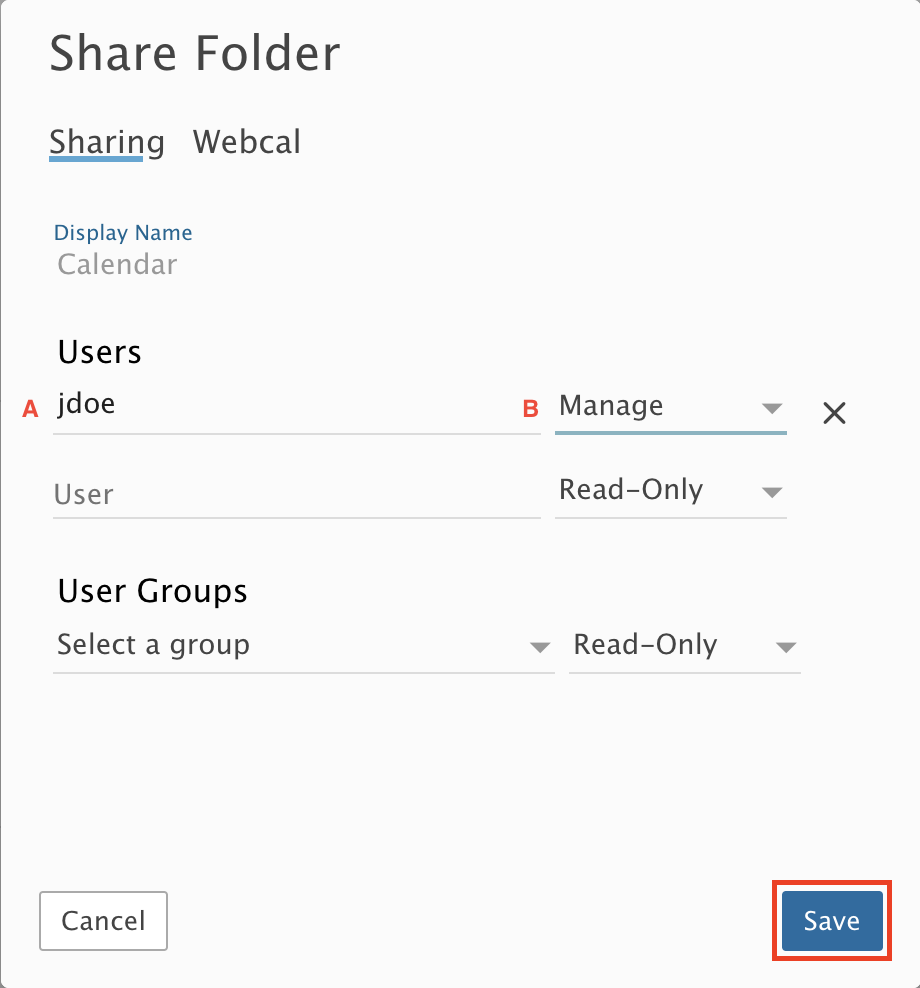
- Start typing the user's name. A pop-up lists matching names. Select the user.
- Choose an Access permission from the drop-down.
- None: no access to your calendar.
- Availability: they can see when you are busy, but not the details.
- Read Only: they can view your calendar in detail but cannot change it.
- Manage: full control to read, edit, add or delete appointments on your calendar.
- Owner: full control to read, edit, add or delete appointments, plus the ability to delete the whole calendar.
Click Save.
Step 3: Or share with everyone
To share with all users in your organization:
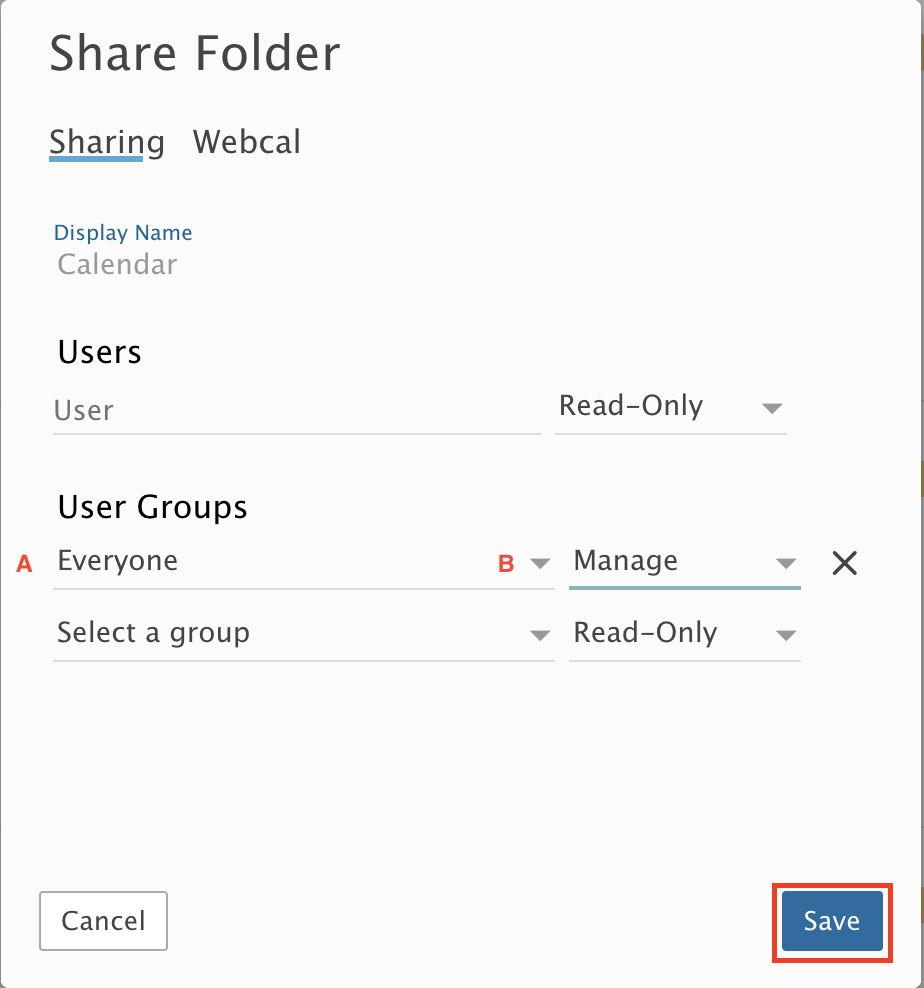
- Select Everyone under User Groups.
- Set the Access permission.
Click Save.
Step 4: Check the other user's calendar
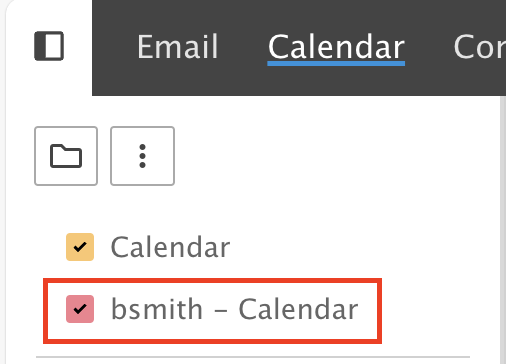
On the other user's Calendar tab, they now see the shared calendar.